A Practical Introduction to Git
So you have heard about Git, but you still need to start somewhere? Let’s do that together by building a simple portfolio website. We will be using the Ruby gem Jekyll which takes Markdown and generates the static HTML pages which can be hosted on Github Pages for free.
You can use whatever operating system you like but I’ll be noting the instructions down for the big 3: Ubuntu, OSX and Windows.
If you and your computer are up for it and you don’t already run Linux or OSX, consider running a development machine with VirtualBox and Ubuntu 14.04.2 LTS or dual-booting.
If you want you can try out Portable Jekyll for Windows which allegedly contains all the things you need to run it on Windows. Or check out this website for a Windows tutorial. After you’ve got Jekyll installed you can come back and join us for the Git part.
- Installing Git
- Setting up Git
- Installing Ruby
- Installing Jekyll
- What’s Git again?
- Github
- Putting Jekyll and Git to use
- Connect Github
- Linking a Domain
Installing Git
To install Git you can use the package manager or the website. For Debian derivatives that is apt, OSX uses homebrew.
Ubuntu
Open the terminal and install git
sudo apt-get install git
OSX
Open the terminal and install git
brew install git
Windows
Download the installer from the git-scm website.
Setting up Git
We will only need to setup Git on our machine once. Use the git config command to set your name and email. These are the credentials that will be used to commit to github, make sure you use your primary Github email and correct name.
Open either your terminal or Git Bash if you’re on Windows.
user.name sets your name:
git config –global user.name “Midas van Oene”
user.email sets your email:
git config –global user.email “Midas.van.Oene@gmail.com”
And we’re all done here.
Installing Ruby
Jekyll is a Ruby gem. If you don’t have Ruby yet, we will use the Ruby Version Manager to install it.
Ubuntu & OSX
Use the terminal to add the key
gpg --keyserver hkp://keys.gnupg.net --recv-keys 409B6B1796C275462A1703113804BB82D39DC0E3
If you do not have cURL
sudo apt-get install curl
Paste this in the terminal to install RVM with ruby
\curl -sSL https://get.rvm.io | bash -s stable
The RVM installer will remind you that you need to run the source command before being able to use RVM and Ruby. Replace username with your own. It’s best to just copy the outputted text.
source /home/username/.rvm/scripts/rvm
After that command worked its magic, check if RVM is installed.
rvm --version
And you will get back something like:
"rvm 1.26.11 (master) by Wayne E. Seguin <wayneeseguin@gmail.com>, Michal Papis <mpapis@gmail.com> [https://rvm.io/]"
Install the latest:
rvm install ruby --latest
Windows
Windows users can install the RubyInstaller and the Ruby DevKit from this page in order to use gems.
Installing Jekyll
To install Jekyll we will use a nifty Ruby feature, the RubyGems. RubyGems is a package manager for the Ruby programming language that provides a standard format for distributing Ruby programs and libraries (in a self-contained format called a “gem”). You can find more about gems here.
I added the ‘- -no-rdoc’ flag because of an install error, if you really want it you can install it manually later. It’s not required.
Ubuntu & OSX & Windows
gem install jekyll --no-rdoc
What’s Git again?
Git is a Version Control System, version control is a system that records changes to a file or set of files over time so that you can recall specific versions later.
Git is not Github. Git is the protocol and Github is one of many sites where you can host remotely. The reason we’re going with Github and not something like Bitbucket is the free hosting of Jekyll pages.
Here are a couple commands to give you an idea and reference. We will run through them as well when we upload the Jekyll site to our github. Oh and Here’s a handy Git cheatsheet from Atlassian.
Add all the files in the current directory to the staging area.
git add .
Commit the added files and add a message
git commit -m "your message"
Push the commited changes to your remote repositories’ master branch
git push -u origin master
[Video] A Quick Introduction to the Git VCS
Github
If you do not have a github account yet, go to github.com and create one.
Make sure you pay attention to your organization name as that will also be your sites name. For example, my organization name is MidasVO thus my github URL is https://github.com/MidasVO and my eventual website name will be MidasVO.github.io.
Go to the top right corner and click on create a new repository: 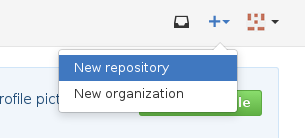
The name of your repository has to be username.github.io otherwise it will not work. You can also add a .gitignore file with the name Jekyll. The files and folders marked in the .gitignore file will not be uploaded to your repository. I’ll be using my own name and repository in the examples, you will simply need to substitute my name with your own to make those commands work. I think that will be more clear than constantly saying username.github.io.
Here’s an example:
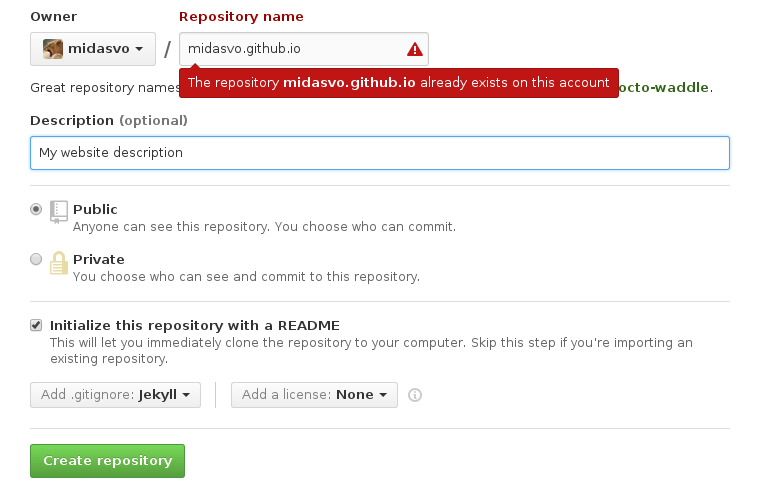
The default .gitignore for Jekyll consists of
_site/
.sass-cache/
Both are folders we don’t need. _site/ carries the generated content, which Github Pages will regenerate somewhere else so it’s just clutter. And .sass-cache is not useful either.
Putting Jekyll and Git to use
We’ve arrived at the fun part; open a terminal in the folder where your projects reside. If you want the same setup as me:
Change Directory to your home folder
cd ~
Create a Projects folder
sudo mkdir Projects
Change Directory to Projects folder
cd Projects
Ubuntu sidenote (nodejs)
In order for Jekyll to run you need nodejs. Update the package list and install
sudo apt-get update && sudo apt-get install nodejs -y
Creating the website
To create a new Jekyll website all we need to do is enter (in your Projects folder)
jekyll new username.github.io
If this succeeded we can run the website locally to edit and test. Go into your website directory
cd username.github.io
And start the Jekyll server
jekyll s
Open your browser and browse to localhost:4000
Welcome to Jekyll!
What you are seeing now when you browse to your locahosts’ port 4000 is the default installation of Jekyll. A short explanation is in order.
The following are all the files generated by Jekyll:
about.md
_config.yml
css
feed.xml
_includes
index.html
_layouts
_posts
_sass
Connect Github
Configure our Name and Email
git config --global user.name "Midas van Oene"
git config --global user.email "midas.van.oene@gmail.com"
To be able to use our Git repository we need to clone it and work from the cloned directory
cd Projects

git clone https://github.com/username/username.github.io.git
Linking a Domain
If visit go to midasvo.github.io you’ll be immediately redirected to midasvo.nl. This is a result of the CNAME file and DNS records. If you have registered a Top-Level Domain Name or created a subdomain, you will need to create 2 A records and a CNAME record. You can do this in your registrars control panel.
DNS
I’m registered at transip and my DNS records look like this:
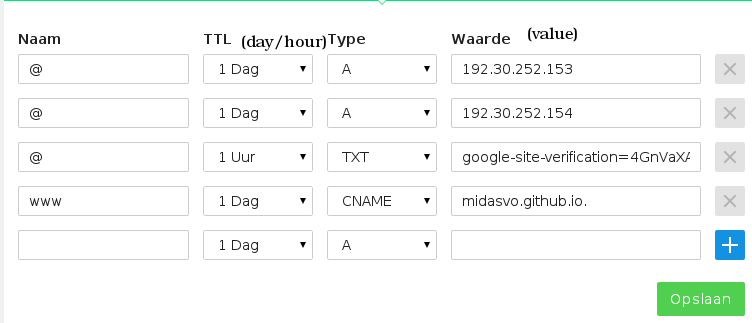
The two A records are a requisite of Github Pages in order for them to route to your page properly. The CNAME record should be username.github.io. for everthing to work. Don’t forget naming them @ and www. The TXT record is for Google analytics.
CNAME file
Create a new file in the root of your Jekyll application named CNAME. The only content this file has is the domain name associated with your page. You can only have one domain name in this file. Use the version without the www. because we’ve already dealt with that on the registrars part.
In my case my /midasvo.github.io/CNAME file contains this:
midasvo.nl
Add the file to your repository
git add .
git commit -m "Added CNAME file"
git push -u origin master
DNS Propegation
It is going to take a while before visiting your domain will show the correct page. This is because only every so many hours the world’s DNS servers get updated with the new listings.
Basically, when you go to http://midasvo.nl your web-browser asks your DNS server where to find midasvo.nl. The DNS server will respond with the correct IP address and your browser will be able to download the website and display it.
It can take up to 24 hours to for the DNS server to propegate fully.